It's winter, and my favorite part of cold weather is wearing sweaters. For today's nail art tutorial I'll be showing you guys how to create this sweater inspired nail art look. It can been a little more complicated, compared to my other tutorials, but with practice it becomes easier. So let's start~~!
Showing posts with label tutorial. Show all posts
Wednesday, January 6, 2016
Winter Sweater Inspired Nail Art~!
Hey Guys~!
It's winter, and my favorite part of cold weather is wearing sweaters. For today's nail art tutorial I'll be showing you guys how to create this sweater inspired nail art look. It can been a little more complicated, compared to my other tutorials, but with practice it becomes easier. So let's start~~!
Wednesday, December 30, 2015
Holiday Glam Makeup Tutorial~!
Hey Guys~!
This will be the last post of 2015 . . . It feels insane because this past year I've apparently , including this one, written 100 posts~~!! Today's 100th and final post of 2015 is a glamorous holiday party look, perfect for going out on New Year's Eve. So let's start~~!
Friday, December 4, 2015
Louis Vuitton Daffodile Heels Inspired Nail Art~!
Hey Guys~!
I love shoes. I have an addiction to buying shoes, but I'm also not a billionaire. One of my dream pairs of shoes are Louis Vuitton Daffodiles. My favorites are black with red on the back. Since I can't afford a pair, today I thought I'd share a nail art tutorial inspired by them. It's super easy, and won't cost as much as the shoes. So let's start~~!
Monday, November 23, 2015
How to Depot NYX Jumbo Eye Pencil~!
Hey Guys~!
I was doing my eye makeup this morning, and I tried to sharpen my NYX Jumbo Eye Pencil. But it doesn't. I then searched the internet, trying to find the best way to sharpen or depot it. Today I'll be showing you guys how I depotted my pencil. Now, this is my first time doing this, and I assume this will work. At the end of this post, we'll see how this worked out. So let's start~~!
Wednesday, November 18, 2015
Lilac Inspired Nail Art~!
Hey Guys~!
It's time for another nail art tutorial~!! Today I'll be showing you guys this simple nail art design inspired by one of my favorite flowers, lilacs. This is more inspired by lilac bushes, where the flowers hang down, but whatever. It is super easy to do, you don't even need professional nail art tools. So let's start~~!
Saturday, October 31, 2015
Broken Porcelain Doll Costume {and Makeup Tutorial}~!
Hey Guys~!
Happy Halloween~!! Today I will be showing you my Porcelain Doll costume that I'm wearing to a party with some friends. There will be a makeup tutorial and an O.O.T.D. so if you are last minute with your costumes like me, you have an idea. So let's start~~!
Saturday, October 10, 2015
Zombie Nail Art Tutorial~!
Hey Guys~!
It's October, and that means Halloween~!! It is one of my favorite holidays because it's the one day a year I can wear cosplay and no one will judge me for it. Anyway, to get in the spooky spirit, I'll be showing you guys how to do this cute zombie nail art. I am a huge fan of AMC The Walking Dead, and the new season is starting this Sunday, so I thought it would be like killing two birds with one stone. So let's start~~!
Thursday, August 27, 2015
Plaid French Manicure Tutorial~!
Hey Guys~!
I've grown my nails out, and now that they're longer I decided to do a french manicure tutorial. But this isn't like any french manicure you have ever seen. The design is a plaid french tip. Also I'll be adding a cute rose decal, but anything looks good with this. It is a bit harder than my other tutorials, but with practice it's quite easy. So let's start~~!
For This Tutorial You Will Need . . .
Base Coat
Nude Nail Polish
Two Nail Polishes of Your Choice
White Nail Polish
Glitter Nail Polish
Clear Top Coat
Nail Art Brush
First apply base coat, to protect your nails from staining and to strengthen them. Once that's dry, apply a nude polish to your nails. Depending on how opaque you want it, apply 1 - 3 coats, I used two. Wait for that to dry before continuing.
With one of your two polishes, I used a teal, and your nail art brush, make a line across each nail at the tip. Then make a teal line towards the tip on the right or left side of the nail. I switched between right and left on each nail.
Once that's dry take your other color, I used pink, and I cleaned my nail art brush, to make a line next to your vertical teal line. Then make a line on the opposite side. Wait for that to dry.
This is optional, but I added a rose decal on my ring finger and thumb nails. I waited for my nail to dry and then placed the sticker on with tweezers. To seal it, I applied clear top coat on the nails with the sticker.
Lastly I applied clear top coat to all of my nails to seal in the design and add a pretty shine~!
I hope you all enjoyed today's nail art tutorial~! If you have any requests for future nail art tutorials, leave them for me in the comments below. Also if you try out this design, share it with me, my social media links are down below. Thank you guys so much for reading and I'll see you at my next post.
xo
Alyss

| Facebook | Twitter | Bloglovin' | YouTube |
P.S. Mary from My Milky Tea is having an awesome giveaway~! Please go check it out <33
Monday, August 17, 2015
Mauve and Green Eye Makeup Tutorial~!
Hey Guys~!
I've been trying more colorful eyeshadow looks recently, and this one has been one of my favorites. Today I'll be showing you guys how I do this mauve and olive green eyeshadow look. It's super easy and the colors aren't too dramatic if you're not used to wearing colorful eyeshadow. And this is a video tutorial, for you guys who don't know I have a YouTube channel. So let's start~~!
Like I said, this tutorial is on my YouTube, so {click here} to watch it on YouTube. If you like it, please go there, like, comment, and subscribe. I did not include my foundation routine in this, since I plan to do a video or post on it in the future.
I've been trying more colorful eyeshadow looks recently, and this one has been one of my favorites. Today I'll be showing you guys how I do this mauve and olive green eyeshadow look. It's super easy and the colors aren't too dramatic if you're not used to wearing colorful eyeshadow. And this is a video tutorial, for you guys who don't know I have a YouTube channel. So let's start~~!
Like I said, this tutorial is on my YouTube, so {click here} to watch it on YouTube. If you like it, please go there, like, comment, and subscribe. I did not include my foundation routine in this, since I plan to do a video or post on it in the future.
ஐ¤*¨¨*¤¨°o.O Here's a List of the Products I Used O.o°¤*¨¨*¤εïз
Elf Eyeshadow Primer in Sheer
Urban Decay Naked 3 Palette {Limit, Nooner, and Strange}
Milani Bella Eyes {Bella Khaki}
Stila Smudge Stick {Halfmoon}
Kat Von Dee Inked It Liner {Trooper}
Elf Mascara Primer
L'Oreal Miss Manga Rock Mascara
Benefit Benetint
I hope you all liked today's tutorial~! If you would like more makeup tutorials, or videos in general, let me know in the comments below here and at my video. I love hearing from you guys, so feel free to share your opinions. I have another tutorial already filmed, so be looking out for it cause it's coming soon. Thank you guys so much for reading and I'll see you at my next post.
xo
Alyss

Friday, July 24, 2015
Gold and Turquoise Summer Makeup Tutorial {All Drugstore Products}~!
Hey Guys~!
Recently I've been trying to incorporate colors into my eye makeup, and I've come up with a few looks that I have enjoyed wearing. Today I'll be showing you how I create this gold and turquoise eye makeup. It is perfect for any summer party you may be attending and it's super easy to do. So let's start~~!
I already have my face makeup on, so let's go straight to the eyes. First I fill in my brows with a Maybelline Brow Precise Pencil in Soft Brown. I fill in the sparse areas and then comb out my brows so the pencil blends and looks more natural. To prime my eyes, I'm applying the Elf Eyeshadow Primer in Sheer. I dot it on my lids and then blend it out with my finger.
The first eyeshadow will be this cream champagne eyeshadow from Maybelline, the Maybelline Color Tattoo in Barely Branded. With a brush I applied it all over the lid and blended it into the inner corner too. To set the cream, I'm applying a champagne powder shadow from L'Oreal, the Infallible Shadow in Iced Latte. This will make the cream shadow last longer.
I'm using a shimmery blue from a Wet and Wild Trio, On Cloud Nine, and I'm applying it on the outer corner as well as blending it into the crease. You don't want it to be too opaque here, we want a light layer of blue first because we'll be building up the color intensity.
Then with a darker blue shadow, this is from another Wet and Wild Palette, Poster Child, I'm applying it to the outer corner to deepen it. I'm blending it lightly into the crease, so there is still depth to the look.
Taking a teal eyeliner from Rimmel, in the color Turquoise, line the lower lash line. Also line the waterline with a white eyeliner, the one I used is from L'Oreal, in the color white.
With a liquid eyeliner, this one is the Jordana Fabu Liner, create a thin line with a little wing. You can do whatever shaped wing liner you like, this is just what I'm doing. Lastly for the eyes, apply mascara to the top and bottom lashes. I'm using Covergirl Clump Crusher.
On my lips I applied this Etude House Fresh Cherry Tint in Orange. On my lips it has a coral color, which I think works nicely with the warm tones in the gold.
I hope you guys enjoyed this makeup tutorial~! If you would like more makeup tutorials in the future, or if you have suggestions for future looks, let me know in the comments below. Also if you recreate this look, share it with me on my social media. Thank you guys so much for reading and I'll see you at my next post.
xo
Alyss
Recently I've been trying to incorporate colors into my eye makeup, and I've come up with a few looks that I have enjoyed wearing. Today I'll be showing you how I create this gold and turquoise eye makeup. It is perfect for any summer party you may be attending and it's super easy to do. So let's start~~!
I already have my face makeup on, so let's go straight to the eyes. First I fill in my brows with a Maybelline Brow Precise Pencil in Soft Brown. I fill in the sparse areas and then comb out my brows so the pencil blends and looks more natural. To prime my eyes, I'm applying the Elf Eyeshadow Primer in Sheer. I dot it on my lids and then blend it out with my finger.
The first eyeshadow will be this cream champagne eyeshadow from Maybelline, the Maybelline Color Tattoo in Barely Branded. With a brush I applied it all over the lid and blended it into the inner corner too. To set the cream, I'm applying a champagne powder shadow from L'Oreal, the Infallible Shadow in Iced Latte. This will make the cream shadow last longer.
I'm using a shimmery blue from a Wet and Wild Trio, On Cloud Nine, and I'm applying it on the outer corner as well as blending it into the crease. You don't want it to be too opaque here, we want a light layer of blue first because we'll be building up the color intensity.
Then with a darker blue shadow, this is from another Wet and Wild Palette, Poster Child, I'm applying it to the outer corner to deepen it. I'm blending it lightly into the crease, so there is still depth to the look.
Taking a teal eyeliner from Rimmel, in the color Turquoise, line the lower lash line. Also line the waterline with a white eyeliner, the one I used is from L'Oreal, in the color white.
With a liquid eyeliner, this one is the Jordana Fabu Liner, create a thin line with a little wing. You can do whatever shaped wing liner you like, this is just what I'm doing. Lastly for the eyes, apply mascara to the top and bottom lashes. I'm using Covergirl Clump Crusher.
Here's the finished eyeshadow look~!!
On my lips I applied this Etude House Fresh Cherry Tint in Orange. On my lips it has a coral color, which I think works nicely with the warm tones in the gold.
I hope you guys enjoyed this makeup tutorial~! If you would like more makeup tutorials in the future, or if you have suggestions for future looks, let me know in the comments below. Also if you recreate this look, share it with me on my social media. Thank you guys so much for reading and I'll see you at my next post.
xo
Alyss

| Facebook | Twitter | Bloglovin' | YouTube |
P.S. Mery Wright is having a Kawaii Box Giveaway so {click here} to enter~!
Thursday, June 25, 2015
Fire Fairy Nail Art~!
Hey Guys~!
It's summer, so I wanted to do a really unique nail art tutorial that's great for any summer colors. Today I'll be doing this abstract Fire Fairy nail art, which will be my first tutorial, I think, with rhinestones~!! Of course you don't have to, but I really like how it looks. So let's start~~!
For This You Will Need . . .
Base Coat
Coral or Orange Nail Polish
Nude Nail Polish
Gold Nail Polish
Clear Nail Polish
Rhinestones
Dotting Tool
First apply your base coat, to protect your natural nails. With your coral or orange nail polish, create a gradient on some of your nails, I did it on my thumb, middle, and pinky fingers.
Next is the dots. With your gold polish, create a dotted arch on the nails with the gradient. You can do however many or whatever size you like. This is what I did.
On your other nails, apply a nude polish. Then do an arch of coral/orange dots. On the top and bottom of the coral arch, do a gold arch of dots.
On one of your gradient nails we'll be applying a rhinestone. First take your dotting tool and dip it in clear nail polish. Make a dot at the base of your nail. Then use the dotting tool to pick up the rhinestone and place it on the dot. This might take some practice, but once you get the hang of it, it's super easy.
Lastly apply a clear polish over all your nails to seal in your design and give it a nice shine~! Now we are finished~!!
I hope you guys enjoyed this nail art tutorial~! If you would like another abstract fairy/fantasy themed nail art, let me know in the comments what element and/or the creature that will inspire the next look. Thank you guys so much for reading and I'll see you at my next post.
xo
Alyss

Thursday, June 11, 2015
Confetti Nail Art Tutorial~!
Hey Guys~!
I wanted to do a really fun and colorful nail art design, and I came up with this. Today I'll be showing you guys how to create what I am calling, Confetti Nails. It is super easy and requires no professional nail art tools. I did a pastel color scheme, but I think there are millions of color options that would look good too. So let's start~~!
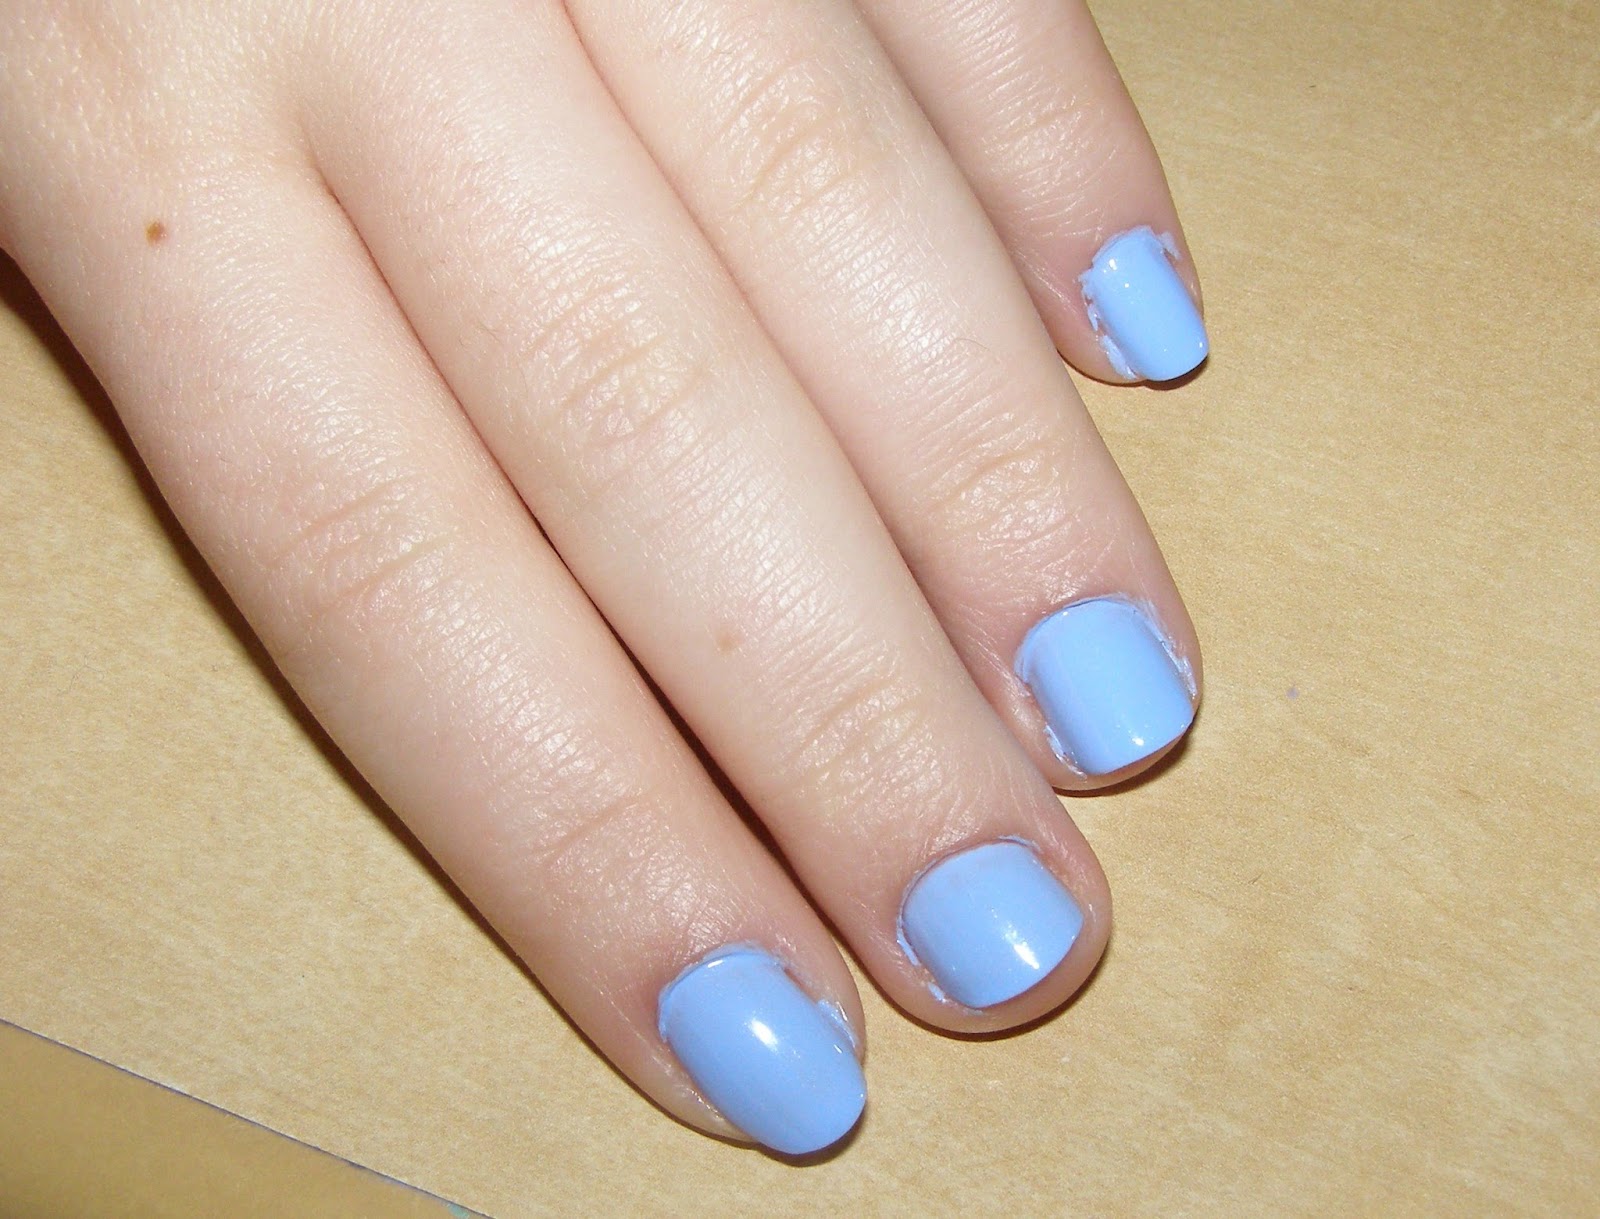
First apply your base coat and let it dry. This will protect your nails from staining. Then apply 2 - 3 coats of your base color. I am using a pale blue from Essie called Bikini So Teeny. Wait for it to dry it between coats, and make sure it's dry before continuing.
Choose some other colors for the 'confetti'. I went with a coral from Etude House, a pastel purple from OPI, You're Such a Budapest, and a pastel green from OPI, Gargantuan Green Grape. I dipped the pencil in the polish and made dots and swirls all over the nail. I started with the coral, then the purple, and lastly the green.
To blend everything, do the same technique with the base color. Wait for this all to dry, it will take a while.
Once it's dry, apply a clear top coat to add a shine and help the design last longer.
And now we are finished~!!
I hope you guys enjoyed this nail art tutorial. If you try it out, or you have suggestions for future nail art tutorials, let me know in the comments below, and share your pictures with me on my social media. Thank you guys so much for reading and I'll see you at my next post.
xo
Alyss
I wanted to do a really fun and colorful nail art design, and I came up with this. Today I'll be showing you guys how to create what I am calling, Confetti Nails. It is super easy and requires no professional nail art tools. I did a pastel color scheme, but I think there are millions of color options that would look good too. So let's start~~!
For this you will need . . .
A Clear Nail Polish / Base Coat
Any Nail Polishes You Like
A Pencil
Choose some other colors for the 'confetti'. I went with a coral from Etude House, a pastel purple from OPI, You're Such a Budapest, and a pastel green from OPI, Gargantuan Green Grape. I dipped the pencil in the polish and made dots and swirls all over the nail. I started with the coral, then the purple, and lastly the green.
To blend everything, do the same technique with the base color. Wait for this all to dry, it will take a while.
Once it's dry, apply a clear top coat to add a shine and help the design last longer.
And now we are finished~!!
I hope you guys enjoyed this nail art tutorial. If you try it out, or you have suggestions for future nail art tutorials, let me know in the comments below, and share your pictures with me on my social media. Thank you guys so much for reading and I'll see you at my next post.
xo
Alyss

Subscribe to:
Posts (Atom)