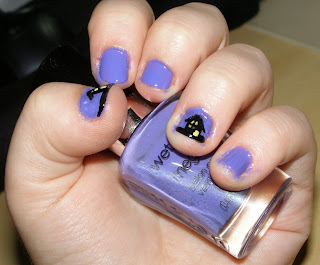
It's October so that means my favorite holiday is coming up soon, HALLOWEEN?!?!?! I've always loved dressing up and this month I'll doing both DIY costumes and themed nail art all this month. Today I'll be starting with this cute haunted house nail art design. This can be done on both long and short nails and looks really cool.
What you'll need is. . .
So gather that all up and let's get started~!
First apply a base coat to your nails and then apply two coats of a purple nail polish. Don't use one that is too dark because then the black will put on later on will blend into the purple. To get an opaque color, apply 2-3 thin coats and let it dry.
The using black nail polish and a nail art brush, paint an arrow shape on your thumb and ring finger nail. Then do a french tip to ground the arrow. Apply multiple coats of the black so it's opaque. The make a small white rectangle on each of the arrows. Using the black nail polish, touch up any edges of the rectangle.
With the nail art brush, apply the yellow nail polish into the white square. Then using black nail polish paint a cross over the yellow to make the window.
Make a white rectangle under the window and once it's dry paint it yellow to make the door. Seal in the design with a clear top coat and you're done~!
I hope you guys enjoyed this haunting nail art. If you have any ideas for DIY costumes or nail art, comment down below and I'll credit you if I use your idea. See you at my next post xo


I like spooky things and I think this nail art idea is so cute ^-^
ReplyDeleteThanks >w<
Delete