Sunday, September 29, 2013

Dreamcatcher Nail Art~!

Hey Guys~!

Today I'll be showing you how to create this super simple Dreamcatcher nail art. I think this design is great for any season and can be made both on long and short nails. Also it's super cute.


For this design you'll need . . .


Base Coat


Any color of nail polish you like


Black nail polish


White nail polish


Nail art brush


Dotting tool


Top Coat


So get all of that together and let's start~!


First apply your base coat to protect your nails. The one I'm using has a built in nail hardener which is great if you have thin nails like I do. After it dries, apply 2 to 3 coats of whatever nail polish color you like. I'm using this pastel lilac color cause I love lilac nail polishes. Make sure it dries in between coats.

Then using a black nail polish and a nail art brush, if you don't have a nail art brush you can use a toothpick, create a curve on your nail. Then create a design inside the curve made up of lines.


Draw 3 or more lines coming down from the curve. They can be different lengths, so don't worry about making all of them look alike. Then with your dotting tool, you can use a toothpick for this too, add a black dot along each of the lines


After that dries, add white dots where certain lines intercept and not along the curved line.


Once it's dry apply a top coat to all of your nails and that's it you're done~!


I hope you guys enjoyed this nail art design. Comment if you liked the tutorial and follow me to see my next nail art tutorial. See you at my next post xo


Wednesday, September 25, 2013

Are They Worth the Hype~? {EOS Lip Balms}

Hey Guys~!

I hope I'm not the only person to have questioned certain popular products about how good they are. But lately I've been questioning certain makeup purchases I've made, both drugstore and high end makeup. Today I'll be talking about a drugstore makeup product which is the EOS Lip Balm.


I heard about these maybe two years ago and I thought they were the coolest things ever. Like come on, it's the only lip balm I've ever seen like this. And the ads EOS makes for these lip balms are adorable. Here's one from a random magazine. . .


How does looking at this not make you want to buy one?

I have five EOS lip balms (I think I have a lip balm addiction.) The ones I have are Honeysuckle Honeydew, the green one, Summer Fruit, the red one,  Medicated Tangerine, the orange one, Pomegranate Raspberry, the berry colored one, and Blueberry Acai, the blue one.


According to the website each of these lip balms are 95% natural and they all contain vitamin E, shea butter, and jojoba oil (all are moisturizing ingredients.)  Also it's free of Petrolatum, Paraben, Gluten, and Phthalate.


The packaging is what made me so intrigued by it initially. Unlike most lip balms that come in a stick or tube, this one was a ball. It's quite durable (I threw it on the floor mulitple times to make sure.) You twist the top off, and your round lip balm is inside. I do think it looks very unique, but my one complaint with this is unlike other lip balms, you can't put this in your pocket. If I'm taking one of these with me, I have to put it in my bag since it doesn't fit anywhere else.

Like I said, theses lip balms are moisturizing. I always like to have a lip balm with me wherever I go, especially in the winter when my lips become a cracked mess. However the longer you have it, the more grainy the texture feels on your lips. If you have an EOS, I think you'll agree with me on this, but the flatter the dome the less smooth the texture is.


EOS lip balms cost around $4 a piece and they do have sets containing two to four lip balms in the $6 - $13 price range. The drugstore does have lip balms less than $4 that work just as well too. And other lip balms that cost a little bit more, have some type of tint normally.

Packaging: ♥♥♥♥
I think it's very unique compared to other lip balms. However I don't like how bulky it is.
Formulation: ♥♥♥♥♥
It feels nice at first, but the longer you have it, the grainier the texture becomes.
Price: ♥♥♥♥
Other lip balms that cost less do the same thing, but it isn't outrageously expensive either. 
Overall: ♥♥♥♥
I do this this is a very unique product and people may be drawn to it just because of the packaging. It is a great lip balm, but I would recommend if you want to purchase this use it as your only lip balm so it doesn't lose its moister over time.

So is it worth the hype?
Yes.

So that was my post on EOS lip balms. If you like the idea of making 'Are They Worth the Hype?' a series on my blog, tell me by commenting on this post. I hope you guys enjoyed this and I see you next time xo


Sunday, September 22, 2013

Herbal Anti-Acne Mask Review~!

Hey Guys~!

I've just been in a kind of crappy mood lately so I haven't posted a tone. To cheer myself up, I did a spa treatment last night using a new favorite of mine. . .


I love face masks. My love for them, probably is unhealthy. But still whenever my skin looks bad, I'll use one. I went to my local H-Mart a few weeks ago and I purchased a new box of sheet masks. It's from the brand My Scheming and I'll be telling you guys what I think of it.

If only you could get rid of zits by hitting them with a hammer -.-"
First of all, the packaging is adorable. I probably shouldn't find zits cute, but they look so cute here getting hit by the hammer. The directions even are cute, but I can't read them cause they're in Japanese. One box, which was $10.00, contained 10 masks, so basically it's $1 per mask. The one problem I have with the packaging was that the English directions are really hard to find. There's in small print on the side of the box, under a bunch of other things.

The really cute Japanese directions~!
Like I said before, this is an anti-acne mask. The brand makes other types of masks though such as whitening and hydrating masks. The anti-acne one contains multiple acne fighting ingredients such as orris and green tea extracts. Both of those are used as calming agents, helping reduce redness. Also it has chamomile which helps moisturize the skin.


So to use the mask first wash your face, I used my Neutrogena Rapid Clear Foaming Face Wash. Next open up the mask, make sure you just rip the packaging, not the actual mask. Place it gently onto your face and them peal off the pearl paper, it's the plastic like paper on the mask. Then, this is just something I like to do, but I pour the extra mask essence into my hand and pat it onto my neck, just cause the neck deserves some love too. Wait 20-30 minutes before peeling off the mask.


This is a before and after shot of me using the mask. The photograph on the left is the before and on the right is the after shot. Clearly you can tell my skin looks less red and more radiant. Also my acne scarring in less prominent in the after shot.

Packaging:
The packaging is cute, but it may be difficult for someone to use, if they've never used a sheet mask, and can't read Japanese.
Price:
I've used other face masks that promise the same, acne fighting ability, but those cost around $3-$4 and I get more than 10 uses out of them.
Quality:
The mask has ripped on me, but that was my first time using a sheet mask. Also it is a little too big for my face, therefore not fitting my face shape.
Results:
It did clear up my redness and made my skin smoother.
Overall:
 I think this is a great mask. I'd never used a sheet mask before trying this one, and I like it. It's less messy than most masks, but it is somewhat expensive if you compare it to other masks. I bring one or two of these when I'm traveling cause they're easier to travel with compared to my other masks.

So that was my review on my first sheet mask. I hope you guys found this helpful if you have acne prone skin like me or found it interesting. Comment if you have any requests for my next post. I'll see you guys next time xo


Monday, September 16, 2013

imPRESS Manicure Review~!

Hey Guys~!

I showed you this product in my {Back to School Haul}, so I decided to review it for you guys. I have short, thin nails, so I've been searching for good fake nails for a while. I've heard about these being a hit or miss products, so I'll tell you guys what I think of them. 


First of all, the packaging is adorable. It's a plastic bottle, shaped like a nail polish bottle. The bottle itself is quite durable, which is great. However it is somewhat hard to open it while wearing the fake nails. It comes with 24 nails in 12 different sizes.  It also contains a mini nail file, to file the fake nails if desired, and a cleansing pad, to clean your nails.


The imPRESS nails come in a ton of different colors and designs, but I just got the french manicure since it's simple and clean looking. Different designs cost more than others do, which I thought was somewhat limiting in case someone had a budget.

Here's the application process. . .

First wash and dry your hands. Then find the correct size of nail to match your natural nails. After lie them out.


Then clean your nails using the prep pad. This is supposed the help the nails stick on longer.

Apply the nails over your own, from pinky to thumb. Press down in the center of the nail to help it stick. You're not supposed to get your hands wet for 30 min or else the glue will loosen. After that, file down the tips with the nail file given.


They claim to last for a week, but after three days the pointer finger's nail came off in my hair. I took them all off yesterday because a few of my nails felt sore. I think these are a great idea for those who need a professional looking manicure for a special occasion and they don't have time or money to go to the salon. However if you want this for an everyday thing, they can be a pain. I had difficulties with some things such as texting, washing my hair, and other daily activities. 

Overall I think these are nice for a quick manicure for a special occasion, but they aren't for everyday in my opinion. I still like them, and I plan on using them for school dances, weddings and any other special event that comes my way.

Packaging: ♥♥♥♥
Price: ♥♥♥♥♥
Staying Power: ♥♥♥♥♥
Variety in Designs: ♥♥♥♥♥

I hope you guys found this review helpful. Comment below if you have any ideas for posts and follow this blog if you liked the post. See you guys soon xo


Sunday, September 15, 2013

Face of the Day: First Day of School~!

Hey Guys~!

School started for me this week ;_; and I wanted to show you the makeup look I wore today. I will also be posting an Outfit of the Day for my first day of school too, but that'll be a separate post.

I wanted my skin to look clean and flawless, so I used my favorite high coverage foundation, Revlon Color Stay. I used the Normal/Oily formula since it's still hot where I live, making my skin still oily. I applied it and blended it out using my hands to help my product look more natural. Then I used my ALMAY Wake Up concealer under my eyes. The color is lighter than my skin tone, therefore brightening up the face. Then I applied my powder, Rimmel Stay Matte all over my face using the ELF Complexion Brush. I just wanted to add a little color to my face, so I used my Dandelion Benefit Boxed Powder. It's a light pink blush, and looks natural on my fair skin tone. 


First I primer my eye lids using an eyelid primer from ELF in the color Sheer. Then using my Milani Brow Fix Kit, I just filled in the sparse parts of my brows.  For my eyeshadow look, I used colors from the Urban Decay Naked Palette. I applied the color 'Sin' onto my lid using the ELF Eyeshadow Brush,  Next I applied 'Naked' into my crease using the ELF Blending Eye Brush. With the same brush, I applied 'Buck' into my outer eye corner and blended it in. Then taking an angled liner brush, I applied 'Naked' on my outer lower lash line. Using Rimmel Scandaleyes in Nude, I lined my water line. With my pinky finger, I applied the color 'Virgin' to my inner corners and my brow bone. Lastly I curler my lashes and applied Revlon Lash Potion to them. 


For my lips, I just applied my Nivea Kiss of Cherry Lip Balm to my lips. The color is a sheer cherry red and it can me build-able. 

So yeah that was my makeup look for school. Comment if you guys want an outfit of the day post for my first day. See you guys at my next post xo

Monday, September 9, 2013

Back to School Haul~!

Hey Guys~!

Tomorrow I start school T_T so I decided to go shopping and get any last minute items I'll need/wanted. I went to Target, Forever 21, and Dollar Tree. I got a bunch of things, so let's get started~!

In Target, I got my ELF Eyelid Primer since I'm almost out of my other one. I get the color Sheer because it blends really nicely into my skin.


Next I got a set of imPress nails. I'd heard a lot of good things about these, so I thought I'd try them out. They are a little pricey, and if you want a review on them, comment at the bottom of this post.


I went to the clearance section and saw a double pack of YesTo Tomatoes wipes. I've been breaking out and the Tomatoes wipes are supposed to help with acne. I really like the YesTo Cucumbers, so I hope these are also good.


I didn't have time to go clothes shopping at Forever 21, but I did find some jewelry pieces I liked. I got this gold cuff bracelet and it's just a simple knot. I really like it and it'll be worn a ton since I love bracelets.

I love the color mint, and I love bows, so I got this. It's a dainty little mint bow on a gold chain. It's super cute and it does come in other colors if you're wondering.


I saw these two pieces and I knew they would look nice together. I got this necklace and ring, both gold wire bows. I have a bow problem, clearly, so I had to get these too.


Last piece of jewelry I got was this necklace set. They are two silver necklaces, one had a heart charm and the other has bunny ears. I love bunnies as much as I love bows, so I mainly got it for the bunny necklace.

At the Dollar Tree, I really don't know why I went here, I got some hair products. First I got Head and Shoulders Volume Boost Shampoo. I ran out of my favorite shampoo, so I got this cause it smells nice, and cause I have fine hair.

Then I got a leave in conditioning treatment by L'Oreal and it's called the Ever Strong Overnight Hair Repair Treatment. It's supposed to help strengthen your hair and I've wanted to try this for a while.


I have no clue why I bought this, but I got the Almay Wake Up concealer. I got the shade #10 Light. It's just a brightening under eye concealer and I thought it would be nice to try, since I have horrible dark circles.

So that was everything I got. Comment if you want a review on any of these products. See you guys soon xo 


Friday, September 6, 2013

☆D.I.Y.☆ Hair Bows~!

Hey Guys~!


At a lot of different clothing stores, I've seen multiple hair bows being sold. They can cost around $10.00, which I think is ridiculous. It's much more fun and cheaper to make it yourself. So, that's what I'll be showing you guys how to do make, a hair bow.


All you'll need is. . .

Fabric 

Thread that matches the color of the fabric

A needle or a sewing machine

Sewing pins

A hair clip or bobby pin

A ruler

Scissors (preferably fabric scissors)

Pencil or Chalk


Now let's start~!

Place your fabric, wrong side facing you, down on a flat surface. I'm just using a random table in my house. Then using your ruler and pencil, draw out a rectangle on your fabric that is 30cm x 17cm (these are the measurements I used for my bow.)  With your scissors, cut around the outline so you leave a tiny amount of space. This will help when your fabric starts to fray. If the sides of your fabric are already straight, you don't need to cut them. 


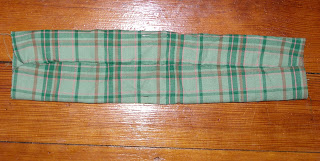
Fold the fabric in half, make sure the side with the pencil outline is facing you, and pin it together. Then with either a sewing machine, or you can hand sew it, sew up the open side that the pins are holding together. Sew along the pencil line we made earlier.


After it's all sewn up, flip it inside out. Then lie it out flat so the middle seem is facing you. With two pins mark the center placing one pin on each side of the line. To make sure it's centered, fold the fabric in half. 


Once you have centered it, fold both sides over so they meet in the center. Pinch the center where the two sides meet, this should create a bow. With two more pins, pin the bow into place.

Thread your needle and push it through the middle. Wrap the thread around the center of the bow tightly. Tie a knot so the thread doesn't unravel. When your bow is held together, you can take out the pins.

Measure and cut a piece of the same fabric, 8cm x 3cm. Fold it in half and pin the sides together. 

Sew it up either with a machine or by hand. Flip it inside out and flatten it so the seem is centered. 


Then sew the sides together. 


Cut off the excess fabric. Slip in a hair clip and that's it, you're done~!


I hope you guys enjoyed this super simple D.I.Y. and comment if you want to see more D.I.Y.s.