Tuesday, July 16, 2013

Maybelline Baby Lips Review~!

Hey Guys~!

Today I went out with my friend to the mall and I bought another Baby Lips from CVS. When I got home, I realized how many Baby Lips I own. One. . . two. . . three. . . four. . . five. . . SIX.  I never loved a lip product as much as I love these babies, so that's the subject of my post today, BABY LIPS~!

Like I said, I own a total of six Baby Lips, three from the original line and three of the limited edition ones.


The ones I have from the original line are #15 Cherry Me, #30 Peach Kiss, and #10 Peppermint.


Cherry Me adds a nice red tint to your lips without being as pigmented as a lipstick, but it still shows up.

Peach Kiss is a natural peachy nude tint and I recommend it as an everyday lip product.

Peppermint is my newest Baby Lips. It's clear, but extremely moisturizing and it has SPF 20.


The limited edition ones I own are #50 Twinkle, #60 Melon Mania, and #70 Coral Crush.

Twinkle looks like it could be a light pink when you look at it, but it's actually clear. It gives a lip gloss type look to whatever you're wearing under it and it gives a shine to natural lips.

Melon Mania gives a tropical pink tint to your lips. It's one of the well pigmented ones like Cherry Me. Personally I wear this color a lot during the summer.

Coral Crush isn't exactly coral, it's more orange tint. I recommend this for warmer skin tones since it doesn't look too good on my pale skin.


I first tried out Baby Lips a year ago. The one I bought was Cherry Me because I couldn't afford any of the red lip products I wanted. I'd heard good things about Baby Lips and about some of them being pigmented, So  I gave Cherry Me a go and I fell in love with it. It felt super moisturizing which I loved since I have kind of chapped lips.

I recommend Baby Lips to all my friends since it's a light feeling product with both pigment and moisturizing properties. I always like to carry one of them with me as my lip balm.

If you've never tried one before, I recommend starting with either Peach Kiss or Peppermint. Peach Kiss has a natural every day look. Peppermint is clear, but it has a minty scent and having it on your lips / near your mouth helps freshen your breath.

I hope this review was helpful to you guys and I hope you enjoyed it~!

Also I hope to post my take on the $20 Makeup Challenge by the end of the week.

Sunday, July 14, 2013

Stila In the Know Palette Review~!

Hey Guys~!


Today I'm here to review one of my favorite eye shadow palettes, Stila In the Know. It's my everyday palette and it's has a great selection of matte neutrals. And it comes with one of Stila's smudge stick waterproof eyeliners.  


The packaging isn't too flimsy, but not extremely sturdy. Its size isn't too big so it could be used for travel, but I'd recommend being careful with it since it could break. Besides that I like the packaging. It's light blue and the writing and stars are a shinny turquoise. It's simple and I think it works for this palette. The mirror inside is a decent size too.


As you can see there are ten eye shadows and an eyeliner within this palette. Like I said this palette is completely matte which I like because super glittery or shimmery eye shadows don't look good on me.

Because the photograph I took of the inside isn't the best quality, I'll describe the colors for you and post some swatches. . .


^^^^

Air - A white shadow (not as pigmented as the other shadows)
Wind - A light cream shadow
Desert - A tan shadow
Clay - A light pinkish-brown shadow
Earth - A deep brown shadow


^^^^

Driftwood - A warm toned brown shadow
Fire - A brick red shadow
Rain - A cool toned brown shadow
Smoke - A neutral grey shadow
Ebony - A deep black shadow


The full sized eyeliner that comes with the palette is in the color Halfmoon. It's a dark grey waterproof liner and I love it. It's well pigmented and really waterproof. It lasts for a long time without smudging under my eye, flaking, or fading.


Overall I really think this palette is extremely worth it to me. I got it six months ago and I've gotten a lot of uses out of it. I think it is a good investment if you. . .

1.) Wear neutrals A LOT
2.) Like matte eye shadow / Want an all matte palette
3.) Don't mind spending $39 on makeup

I hope this review was helpful to you if you plan on purchasing this palette~!

Saturday, July 13, 2013

Sephora Samples Review~!

Hey Guys~!

Sorry I haven't posted something in a while. I've just started camp, so I've been a bit busy. But here I have some product reviews for you guys. So I went shopping a few weeks ago at Sephora and since I'm poor, I got a ton of samples. So I decided to review them for you guys.

I have. . .


- Smashbox Photo Ready BB Cream
- Benefit They're Real! Mascara
- Benefit Watt's Up
- Lancôme Cils Booster XL
- First Aid Beauty Ultra Repair Cream

With that, now let's get into the review~!

--------------------------------------------------------------------------------------------

I've been trying to find a BB Cream for months now that I like. I tried the Maybelline one and the shade Light was too dark. So when I went to Sephora, I asked for a BB Cream sample so I could try it out. Initially I liked that it had SPF 35 and a Fair option. Because I'm extremely pale, I decided to sample the BB Cream in Fair. I tested it on my cheek because I have extremely red cheeks. I think this BB Cream has nice coverage if you compare the photographs.  Also it feels really light which is how I like a BB Cream to feel. Overall I think this is a nice BB Cream and if you have money to spend, I recommend it.


--------------------------------------------------------------------------------------

I always like testing out new mascaras so when I got a mini Benefit's They're Real! sample, I was excited since I'd heard it was a good mascara. The wand has thick, spikey bristles and a sphere shaped tip with the same bristles.

It gives my lashes a thickness that I really like. Also it holds a curl really well. This is a really nice mascara if you can afford it, but a dupe for it is the ELF 3-in-1 Mascara. It's only $3 and it can be purchased at Target or on the ELF website. They have extremely similar wands except the ball on the ELF one is bigger. 


-----------------------------------------------------------------------------------------

The next product is also from Benefit and it's a highlighter called Watt's Up. First of all I love the name and the packaging. I though I wouldn't like it cause I've never been a fan of highlighter. I had already tried Benefit's High Beam and it looked really bad on me. But I love this highlighter. It's a champagne color which I think looks nice with my skin tone. It gives a nice natural glow to my cheeks and I plan on buying the full sized one when I run out of my sample.


-----------------------------------------------------------------------------------------

I've never tried anything from Lancôme so getting this sample was exciting for me. I got the Lancôme CILS Booster XL, a mascara primer. I don't exactly understand the point of a mascara primer, but I thought it would be fun to try out. The product is white, but it doesn't turn your lashes grey or change the color of the mascara, and on a very basic wand. This promises to maximize the effects of your mascara. To test it I decided to use my Revlon Lash Potion Mascara (which I love). Lash Potion is a lengthening mascara and I thought the CILS Booster XL would lengthen my lashes even more. It applies strangely and it ruined the curl of my lashes and made them straight. Also it did nothing for my mascara. I don't recommend this product at all. It does nothing at all and the full size is $24.

-------------------------------------------------------------------------------------------

My last product is a skin care sample that one of the Sephora employs recommended to me. It's called the First Aid Ultra Repair Cream. I have combination skin so sometimes my skin gets randomly dry. (I forgot to take a before and after picture of this product) I love using this because my skin doesn't feel greasy afterwards like it does with some creams. If you have dry skin or combination normal/dry I recommend this cream and I think it's completely worth it.

Alright so those are my reviews on some samples I got a Sephora. I hope this was helpful for you guys.

See you at my next post~!

Wednesday, July 3, 2013

4th of July Inspired Nail Tutorial~!

Hey Guys~!

So today I felt like getting my nails ready for 4th of July in advanced and here's the look I created. . .


Here's where you'll need
- a base coat (I used Revlon's Nail Hardener)
- red nail polish (I used Revlon's Cherry Bon Bon)
- blue nail polish (I used Essie's Beach Bum Blu)
- white striper (I used Milani's Nail Art in White Canvas)
- glitter top coat (I used an LA Colors Color Craze Glitter Polish)
- a nail art brush (I used a cheap paint brush)
- Vaseline
                                         
::rhinestones are optional::

 
So let's get started~!


Apply a base coat
to protect and
strengthen your nails.
If you don't have a
base coat you can use
any clear nail polish
or nail hardener.
 
 
Then put on 2-3 coats
of any red nail polish
 of your choice. I used
Cherry Bon Bon by Revlon
cause it's a cherry red and
it smells like cherries :3
 

 Take your nail art brush (or a thin paint brush
and dip the tip in Vaseline. This will protect
the brush from drying out because of the nail polish.
Rub off any access Vaseline before dipping the
brush in your blue polish. I'm using Beach Bum
Blu from Essie. If you want to know more about
that polish, check out my previous blog post.
 
Pick a corner or two of your nail
and using the brush, lightly drag
the color so it looks like this. . .
 

Then with your white striper repeat
what you did with the blue nail polish,
but use it sparingly so you don't
cover up all of the blue.


Once that is dry apply a glitter top coat of
your choice. I used a silver glitter by LA
Colors. To add some more shine add a
rhinestone on the center of the fire work,
or take a glitter polish with larger pieces
of glitter and then applied that sparingly
on the center of the fireworks.


 And then you're done :)

I hope you enjoyed this nail art tutorial and have a great 4th of July~!

Tuesday, July 2, 2013

ULTIMATE Summer Nail Polishes~!

Hey Guys~!

I went to Ulta, CVS, and Walgreens last week and I bought some new nail polishes from Essie, Wet and Wild, Sinful Colors and China Glaze. I've tried all of them out and now I'll be reviewing them here.

From Essie I got Bikini So Teeny and Beach Bum Blu. Bikini So Teeny is a periwinkle colored polish and I love it (I'm wearing it on my nails now). I put it on yesterday, without a topcoat, and it hasn't chipped at all. It has a nice shine to it without any shimmer or glitter. The other polish I got, Beach Bum Blu, is a turquoise color with tiny amounts of shimmer in it. In certain lighting it can seem more green and in others it seems more blue. Either way it's a beautiful color.

From Wet and Wild I got the Mega-last Polish in On a Trip. It's a cool  toned purple nail polish with no shimmer or dual chrome, but it doesn't have a matte finish either. The color stands out on every skin tone. I really like the Mega-last polishes because they have wide brushes which makes applying the polish much easier. Also like the name implies, this polish lasts a long time. If you want a long wearing polish from the drugstore I recommend the Mega-last brand from Wet and Wild.


From Sinful Colors I got Hazard. It's a peachy coral color and it's perfect for summer. It has a matte finish, but I put a shiny top coat on it because I think it looks nicer that way. Like most Sinful Colors nail polishes, Hazard takes a while to dry and it NEEDS a top coat (matte, glitter, etc.) or else it will chip. Besides that, Hazard is a great coral color for anyone.

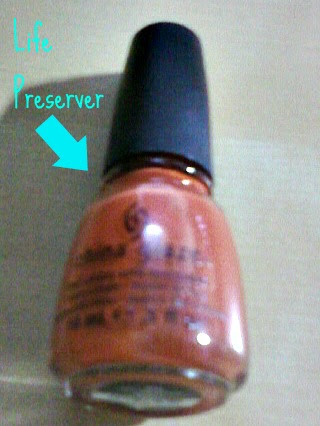
From China Glaze I got Life Preserver. It's a reddish orange color. The first coat seems sheer, but after 2-3 coats it's an opaque color. I personally I only like it on my toes since I have really pale skin. If you have a deeper completion I think this color will look nice on your fingers and toes. This polish lasts really well with a top coat and doesn't chip quickly.


So there you have it, my new and favorite summer nail polishes. Tell me your favorite summer polishes in the comment box and I hope to see you all at my next post.


Saturday, June 22, 2013

Announcements for the Summer

Hey Guys :)

So school is just about over for me YAYYYY XD

That means I'll have more time to blog

and

I'm going to be starting a YouTube Channel!

I'm going to post

makeup tutorials,

hauls,

and other beauty videos there.

If you have any suggestions for my first video, please comment them.

Can't wait for school to be over

~Alyss

Saturday, June 8, 2013

How To Pick the Right Face Mask for Your Skin Type~!

Hey Guys

I have exams coming up ;_;
So to help calm myself down,
I like to give myself a facial.

And that gave me the idea for this post :)
I'm going to show you guys how to find a face mask for . . .

- Dry Skin

- Oily Skin

- Acne Prone Skin

All of the masks I'll be telling you guys about can be purchased at your local drugstore or on Amazon.

Also I've tried all of them out before writing this review and I'll be giving you my honest opinions on them.

Alright, let's get started~!

For Dry Skin I recommend the Freeman Cucumber Peel-Off Facial.


I use this mask when it's cold cause my skin gets really dry then. I apply this mask after a shower usually to my face. It's a clear gel and when it dries, your skin has a plastic look to it. When I peel it off, which is my favorite part, my skin feels smooth and fresh. However if you by accident get it on your eyebrows, peeling the gel off is painful. To avoid that after applying the mask I take a wet Q-tip and rub it over my brows to remove the mask.

-------------------------------------------------------------------------------------------

For Oily Skin I recommend the Freeman Avocado and Oatmeal Clay Mask.
This mask contains vitamin E which gets rid of excess oils and helps to unclog your pores. Applying the mask is so much fun because the clay feel great when you first put it on. When it's dry and I wash it off, my skin feels clean and refreshed. Also I like that the mask doesn't dry out my skin, unlike some clay masks that make my skin dry after washing off the mask.

---------------------------------------------------------------------------------------------
For Acne Prone Skin I recommend the Freeman Dead Sea Mineral Facial.
I love to use this mask when I'm breaking out cause it soothes my skin. When you apply it it's a light blue turquoise color and it feels lighter than the Avocado Oatmeal Mask. Compared to the other two, this is the easiest to wash off.


I hoped you guys enjoyed this review
and comment for any other reviews you want to see~!